pH Electrode Care and Maintenance Procedures
Your pH electrode will eventually reach the end of its useful life as its performance naturally degrades over time. To maximize the performance of your pH electrode and extend its life span, proper care and regular maintenance are equally required.
Please note the specific details listed below are referencing HORIBA pH electrodes, however this information basically applies to all brands of electrodes
Refer to the safety data sheet (SDS) of the chemical solution to be used in cleaning and wear the appropriate personal protective equipment for safe handling.
Refilling
The pH electrode may be filled with either an ionic liquid solution (refillable or liquid-filled pH electrode) or ionic gel solution (sealed or gel-filled pH electrode). Gel-filled pH electrodes do not require routine refilling and typically require less maintenance than liquid-filled electrodes. Liquid-filled pH electrodes are constructed with refilling port, which is securely covered with a slider. The refilling port allows you to fill or empty the reference chamber.
 To top up or re-fill the reference chamber of liquid-filled pH electrode, push the slider upward to uncover the refilling port and insert a dropper containing fresh 3.33M potassium chloride (KCl) solution. The filling solution should reach the bottom of the refilling port. To top up or re-fill the reference chamber of liquid-filled pH electrode, push the slider upward to uncover the refilling port and insert a dropper containing fresh 3.33M potassium chloride (KCl) solution. The filling solution should reach the bottom of the refilling port. |
|
 The filling solution level must be maintained just below the refilling port and higher than the pH buffer or sample level during calibration and measurement. This creates a positive head pressure forcing the filling solution to leak into pH buffer or sample through the junction and preventing the reverse. The filling solution level must be maintained just below the refilling port and higher than the pH buffer or sample level during calibration and measurement. This creates a positive head pressure forcing the filling solution to leak into pH buffer or sample through the junction and preventing the reverse. |
|
 Bubbles may form and get trapped within the solution of the sensing tip or reference chamber during transportation. This can affect the operation of your pH electrode. To dislodge the bubbles, gently shake the electrode body. Bubbles may form and get trapped within the solution of the sensing tip or reference chamber during transportation. This can affect the operation of your pH electrode. To dislodge the bubbles, gently shake the electrode body. |
|
 If the filling solution inside the reference chamber gets contaminated with sample or microbial growth or the reading is drifting, change the filling solution. Tilt the pH electrode, uncover the refilling port, and draw out the old solution using a dropper before refilling it with fresh 3.33M KCl solution. If the filling solution inside the reference chamber gets contaminated with sample or microbial growth or the reading is drifting, change the filling solution. Tilt the pH electrode, uncover the refilling port, and draw out the old solution using a dropper before refilling it with fresh 3.33M KCl solution. |
Conditioning
Nowadays, combination and 3-in-1 pH electrodes are commonly available. Both types of pH electrodes consist of glass electrode and reference electrode built in one body, but the latter is integrated with temperature sensor for detecting the temperature of the solution being measured.
The glass electrode has a silver-based electrical wire suspended in a neutral solution with KCl contained inside a special glass. The surface of the glass bulb or membrane at the tip of the electrode must be hydrated to function properly. This can be accomplished by immersing the glass membrane in an aqueous solution, where a hydrated layer that is responsible for the pH response of the glass, is developed.
Another component of the pH electrode that must remain hydrated is the junction of the reference electrode. The junction is made of porous material such as ceramic or sintered polyethylene, which allows filling solution of the electrode to leak into the solution being measured. Keeping the reference junction hydrated will prevent precipitation of KCl from the filling solution which may clog it and cause erratic or slow electrode response.
 All pH electrodes come with white protective cap. A sponge wet with pure water is positioned at the bottom of the cap to keep the glass membrane and junction moist. If you find KCl salts formed on the junction or refilling port of your pH electrode, simply rinse off using clean water. This KCl creep from the filling solution is normal. All pH electrodes come with white protective cap. A sponge wet with pure water is positioned at the bottom of the cap to keep the glass membrane and junction moist. If you find KCl salts formed on the junction or refilling port of your pH electrode, simply rinse off using clean water. This KCl creep from the filling solution is normal. |
|
| A dry pH electrode will give inaccurate reading in pH measurement. Condition a dry pH electrode by soaking the glass membrane and junction in pH 7.00, 4.01 buffer, or tap water for at least 1 hour to regenerate the hydrated layer. Note: High salt solutions such as 3.33M KCl and the like are not recommended for conditioning our pH electrodes. After conditioning, rinse the pH electrode with clean water and proceed with calibration. | |
| Never touch the glass membrane with fingers as oil or dirt may coat the glass and interfere with measurement. |
Calibration and Measurement
 If a liquid-filled pH electrode is in use, the refilling port must be uncovered and the filling solution level must be higher than the pH buffer or sample level. These conditions will ensure smooth outward flow of filling solution through the junction during calibration and measurement. If a liquid-filled pH electrode is in use, the refilling port must be uncovered and the filling solution level must be higher than the pH buffer or sample level. These conditions will ensure smooth outward flow of filling solution through the junction during calibration and measurement. |
|
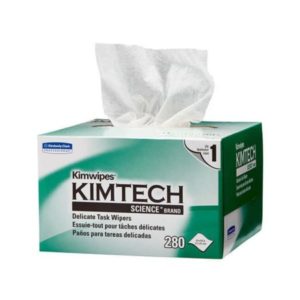
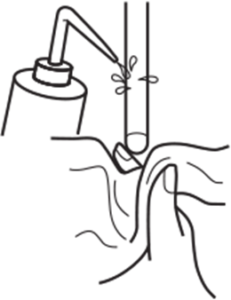 Before and after measurement, rinse the pH electrode with clean water and/or with a portion of the next solution to be measured and blot with soft lint-free tissue to remove excess water or solution. Rinsing between measurements prevents contamination by carry-over on the electrodes. Avoid wiping or rubbing as this can scratch the glass membrane, remove the hydrated layer, and cause static charge, resulting in inaccurate pH readings. Before and after measurement, rinse the pH electrode with clean water and/or with a portion of the next solution to be measured and blot with soft lint-free tissue to remove excess water or solution. Rinsing between measurements prevents contamination by carry-over on the electrodes. Avoid wiping or rubbing as this can scratch the glass membrane, remove the hydrated layer, and cause static charge, resulting in inaccurate pH readings. |
|
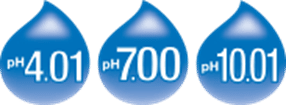 Calibrate frequently using at least two fresh pH buffers that bracket the expected sample pH value. Make sure that the glass membrane and junction of pH electrode are both immersed in pH buffer or sample. Calibrate frequently using at least two fresh pH buffers that bracket the expected sample pH value. Make sure that the glass membrane and junction of pH electrode are both immersed in pH buffer or sample. |
|
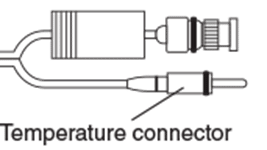 To compensate for temperate effect on pH, use either 3-in-1 pH electrode or combination pH electrode and temperature probe. If temperature probe is not available, check the solution temperature using a calibrated thermometer and input the reading into the meter. To compensate for temperate effect on pH, use either 3-in-1 pH electrode or combination pH electrode and temperature probe. If temperature probe is not available, check the solution temperature using a calibrated thermometer and input the reading into the meter. |
|
 Stir pH buffers and sample at same rate. Stirring provides representative pH value of a solution and faster electrode response. If stirring is not possible due to measurement noise, limited sample volume or other reasons, it may be abandoned in both calibration and measurement. Stir pH buffers and sample at same rate. Stirring provides representative pH value of a solution and faster electrode response. If stirring is not possible due to measurement noise, limited sample volume or other reasons, it may be abandoned in both calibration and measurement. |
|
| There is a wide selection of pH electrodes, and each model is designed to suit specific applications. Choose the best pH electrode suitable for your sample. |
Cleaning
 1. If the pH electrode is liquid-filled, uncover the refilling port. 1. If the pH electrode is liquid-filled, uncover the refilling port. |
|
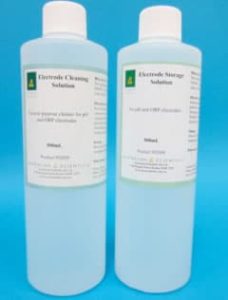
 2. Clean the tip of your pH electrode using the appropriate cleaning solution. Make sure that the glass membrane and junction are both immersed in cleaning solution. 2. Clean the tip of your pH electrode using the appropriate cleaning solution. Make sure that the glass membrane and junction are both immersed in cleaning solution.
|
|
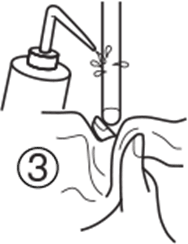 3. Rinse the pH electrode with clean water. 3. Rinse the pH electrode with clean water. |
|
 4. If the pH electrode is liquid-filled, draw out the old filling solution from the reference chamber. Refill it with fresh 3.33M KCl (See Refilling). 4. If the pH electrode is liquid-filled, draw out the old filling solution from the reference chamber. Refill it with fresh 3.33M KCl (See Refilling). |
|
 5. Condition the pH electrode (See Conditioning). 5. Condition the pH electrode (See Conditioning). |
Storage
pH electrodes must be clean before they are stored for any length of time.
 1. If the pH electrode is liquid-filled, cover the refilling port with the slider to prevent evaporation of filling solution. 1. If the pH electrode is liquid-filled, cover the refilling port with the slider to prevent evaporation of filling solution. |
|
 2. Wash the protective cap with clean water to wet the sponge and remove KCl salts. 2. Wash the protective cap with clean water to wet the sponge and remove KCl salts. |
|
 3. Insert the pH electrode into the protective cap with wet sponge. The water will not dissipate easily as the cap fit snugly on the electrode body. This environment is enough to keep the glass membrane and junction moist. It is not necessary to fill the cap with clean water and soak the pH electrode tip. 3. Insert the pH electrode into the protective cap with wet sponge. The water will not dissipate easily as the cap fit snugly on the electrode body. This environment is enough to keep the glass membrane and junction moist. It is not necessary to fill the cap with clean water and soak the pH electrode tip. |
Short-term storage:
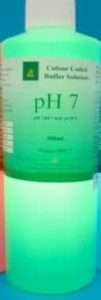
Between measurements, the pH electrode can be soaked in pH 7.00 buffer or clean water (e.g., tap, distilled, or deionized).


 ent
ent
